XGR Wallet Connect — How to connect your wallet
This guide shows how to connect a browser wallet (e.g., MetaMask) to the XGR app, pick the right chain (Mainnet/Testnet), and fix common issues. Clear, customer-friendly, same style as the Read-Key guide.
1) What you need
- A browser wallet (e.g., MetaMask, Trust Wallet extension).
→ Install & network setup: https://xgr.network/network-mainnet.html - A supported browser: Chrome, Brave, Edge, or Firefox.
- Optional: Hardware wallet (Ledger/Trezor) via MetaMask.
If no wallet is installed, the panel will say “No Ethereum provider detected.” Use the link above to install a wallet, then reload the page.
What you see

2) Quick start
- Install and enable your wallet in the browser.
- Open the Wallet Connect panel in the XGR app.
- Pick the chain: XGR Mainnet (live) or XGR Testnet (try-out).
- Pick your wallet (e.g., MetaMask).
- Click Connect and approve the wallet dialogs.
- The status shows Connected with your address; use Disconnect to stop.
Next steps (builders)
Go to XRC-137 Builder
or XRC-729 Builder
What you see (no wallet installed)

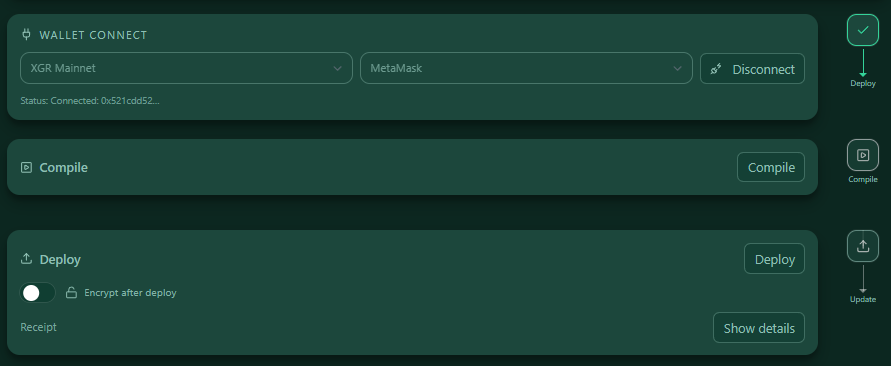
 What you see (connected)

3) Choose the chain (network)
- XGR Mainnet — Chain-ID
0x66b, RPChttps://rpc.xgr.network, Explorerhttps://explorer.xgr.network - XGR Testnet — Chain-ID
0x757, RPChttps://rpc.testnet.xgr.network, Explorerhttps://explorer.testnet.xgr.network
The app already knows these networks. Modern wallets will ask to add/switch when needed — simply confirm.
Tip: Use XGR Testnet when you want to test; use XGR Mainnet for real transactions.
4) Pick your wallet
The panel auto-detects installed wallets (EIP-6963 discovery) and lists them (MetaMask, Trust Wallet, etc.).
If nothing is found, you’ll see the hint with a link to the installation page. After installing, reload the page.
5) Connect & disconnect
- Connect opens wallet dialogs so you can grant access to your address.
- After connecting, the panel shows Connect and the last 4 signs of your address.

- Disconnect ends the session in the app (the browser extension remains installed).

Security: Connecting only grants read access to your address/network. Transactions or signatures never happen without an explicit wallet prompt.
6) Panel elements (explained)
- Chain select (left): choose Mainnet/Testnet (may be project-locked).
- Wallet select (middle): choose a detected wallet (e.g., MetaMask).
- Connect/Disconnect (right): connects or disconnects. The button is disabled if no wallet is detected or no wallet is selected.
- Hint line: shows “No Ethereum provider detected” with a link if nothing is installed.
- Status line: shows Connecting wallet…, Connected: 0x…, or error text.
7) Troubleshooting
A) Wallet not detected
- Install/enable a wallet → https://xgr.network/network-mainnet.html / https://xgr.network/network-testnet.html
- Reload the page; pin the extension in the browser (puzzle icon).
B) Wrong network / chain
- Switch to the XGR chain in your wallet. When prompted, add and switch.
C) Connect failed / no dialog
- Check the popup blocker. Unlock the wallet, then click Connect again.
- If cancelled multiple times, reload the page and try again.
D) Hardware wallet
- Connect via MetaMask (import your Ledger/Trezor account). Then click Connect.
E) Switched account or wallet
- Switch the account in your wallet → the panel will automatically disconnected the Wallet. Click Connect again to connect the new account with the page.
Where Wallet Connect sits in the flow
Wallet Connect is step 1 of 4 (Wallet → Deploy → Update).
The right-side flow shows your progress and highlights the next active step.
What you see
 — Flow with the Wallet step highlighted as active when you land on the page.
Last updated: 2026-01-17